
This page explains the three ways to display the captured image and their procedures. For plugin installation, see Setup.
The settings are common to the three methods. For details on target window selection and frame rate, see Capture Settings.
Place WindowCapturePlane in the level
This method displays the captured image on a plane in 3D space. You use the bundled WindowCapturePlane.
- Open the
WindowCapture2D Content→PlaneActorfolder in the Content Browser tree view and selectWindowCapturePlane.
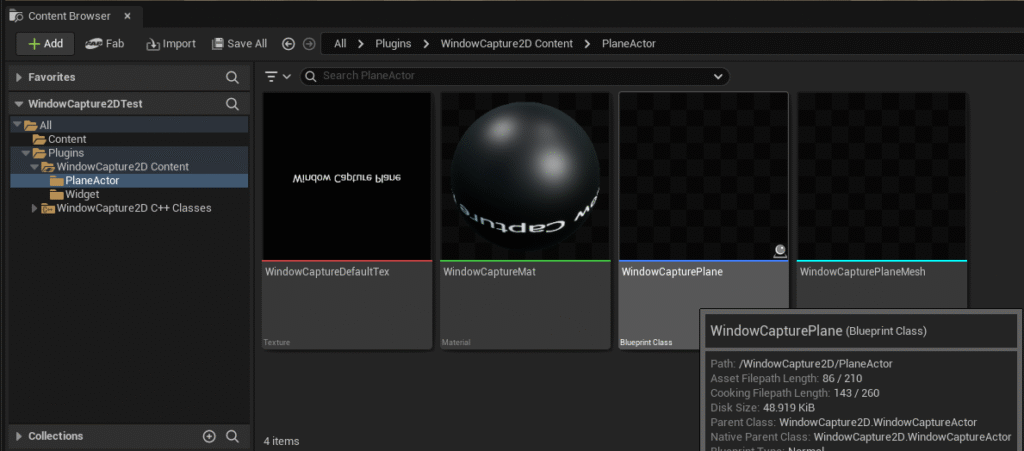
- Drag
WindowCapturePlaneinto the level and place it. - In the placed Actor’s Properties, enter the title of the window you want to capture in
Capture Target Title. - Run Play In Editor. The captured image of the target window appears on the plane.
If the target window is not found, capture does not start and a Warning is printed to the Output Log. To review the title, see Capture Settings.
Place WindowCaptureUMG on a widget
This method displays the captured image as part of your UI. You place the bundled WindowCaptureUMG on a User Widget Blueprint.
- Open the User Widget Blueprint and place
WindowCaptureUMGfrom the Palette.
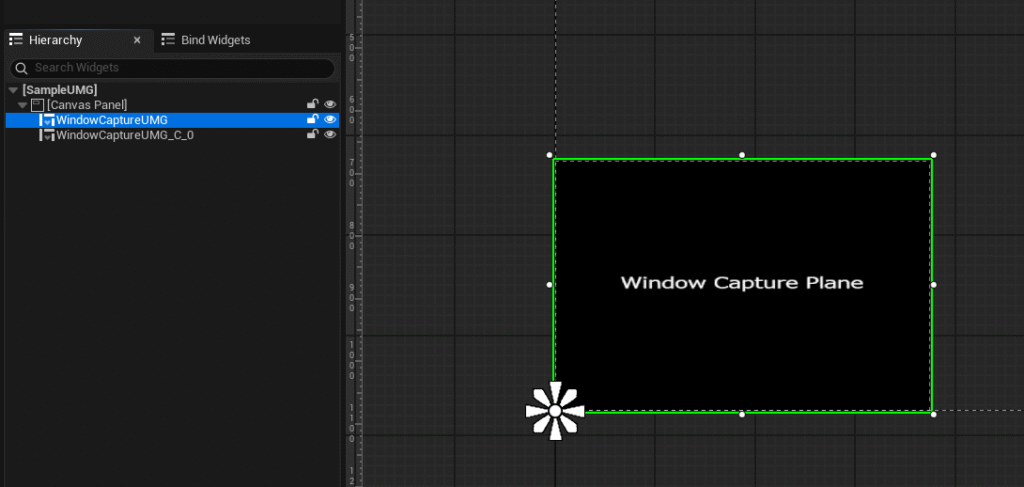
- In the Properties of the placed
WindowCaptureUMG, enter the title of the window you want to capture inCapture Target Title. - When the widget is shown on screen, the captured image appears.
The settings are the same as for WindowCapturePlane.
Handle the texture directly with CaptureMachine
This method is for cases where you want to process the captured image yourself, such as swapping it into a material. You create a CaptureMachine object and receive the Texture2D through an event.
- In Blueprint, run
Create Object(Class:CaptureMachine) and store the created object in a variable. The object is used until you stop capturing, so storing it in a variable is mandatory.
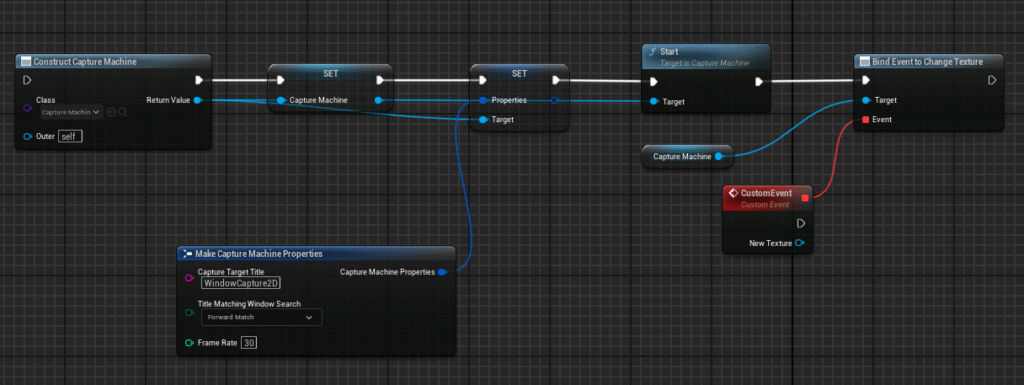
- Set the window information of the capture target in the
Propertiesof theCaptureMachineobject. - Call the
Startmethod of theCaptureMachineobject to start capturing. - When the window is captured, the
Change Textureevent fires and you can obtain theTexture2Dobject. - When you finish capturing, call the
Disposemethod.
WindowCapturePlane and WindowCaptureUMG are Blueprints that wrap this CaptureMachine operation. They create and destroy the object automatically, so use them in normal cases.
How to choose
| Situation | Recommendation |
|---|---|
| Display a screen in 3D space | WindowCapturePlane |
| Embed a screen as part of your UI | WindowCaptureUMG |
| Process the texture with a material | Use CaptureMachine directly |
Next steps
- Check the title matching rules, monitor selection, trimming, and frame rate in Capture Settings.